Steps to Use a Table top Magnifier: Making Small Things Big
Have you ever wanted to see something up close? That’s what a Table top magnifier does! It’s a tool that helps make small things look bigger. But just having one isn’t enough. To see things clearly, you need to know how to use it correctly. Let’s learn how!
1. Place the Magnifier: Position the magnifier on a flat, stable surface where you’ll be comfortable working. Make sure the area has good lighting, as more light improves visibility. Some tabletop magnifiers may even have a built-in light source.
2. Position the Object: Place the object you want to magnify under the lens. That could be a brass component, circuit board, precision tool, tiny parts or components of the automotive industry, or any other item you want to look closely at.
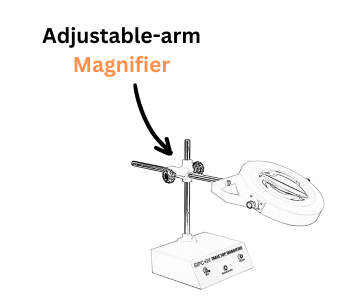 3. Adjust the Magnifier: If your Table top magnifier has an adjustable arm, you can change the height and angle of the lens to better focus on the object. Adjust the distance between the object and the lens until the image comes into clear focus. Some models also have a focus ring that can be used to bring the object into focus.
4. Use Both Hands: Now that the magnifier is set, you can use both hands to adjust the object. It helps move tiny components of brass or precision accordingly.
5. Move the Object as Needed: As you inspect or work, you’ll likely need to move the object to see different areas. Slide or reposition the object while keeping it under the lens.
6. Turn on the Built-in Light if Available: If your Table top magnifier has a built-in light, turn it on to illuminate the object more directly. It can reduce shadows and provide more contrast, which can be very helpful for detailed tasks or inspection work.
 7. Clean the lens: If the image is not clear, the lens may be dirty. Use a lens cleaning cloth or solution to clean the lens gently. Please avoid using any material like Harsh cleaning chemicals, as they can damage the lens.
Using a magnifier can be fun and helpful! It lets you see tiny details you might miss with just your eyes. You’ll get the best view every time by following our easy steps. So, pick up your magnifier and explore the small wonders around you!

FAQs – Table Top Magnifier
Q1. What is a table top magnifier used for?
A table top magnifier is used to clearly view small and detailed objects such as circuit boards, precision tools, brass components, and tiny mechanical parts. A magnifier table top helps improve accuracy during inspection and assembly work.
Q2. How do you focus a magnifier table top correctly?
To focus a magnifier table top, adjust the lens height or angle and change the distance between the object and the lens until the image becomes sharp. Many table top magnifiers also include a focus ring for fine adjustment.
Q3. Why is lighting important in a table top magnifier?
Proper lighting enhances visibility and reduces eye strain. A table top magnifier with built-in light helps reduce shadows and improves contrast, making small details easier to inspect.
Q4. Can small components be moved while using a table top magnifier?
Yes, once the table top magnifier is properly positioned, you can move or rotate the object under the lens to inspect different areas without losing focus.
Q5. How should a table top magnifier lens be cleaned and maintained?
The lens of a magnifier table top should be cleaned using a soft lens cloth or approved cleaning solution. Avoid harsh chemicals, as they may damage the lens and reduce magnification clarity.